Tuesday, 24 April 2012

On The Level

Your sound goes through a number of pre-amplification stages - on both recording and play back. If your levels are peaking above 0dB (in the digital world) on any of these stages that you will introduce unwanted distortion. If this happens at the recording stage then you may well have to re-do your recording. At the mixing stage this will just ruin your mix .....

Recording
Set your levels in this order, the order that your sound source will be travelling through
  1. Pre-amp (if you have one). Usually these have a meter. Make sure the meters are not peaking into the red at the loudest notes and leave a little to spare as vocalists and guitarists tend to "go for it" a bit more after the level check when they do the real thing.
  2. Audio Interface: Set this in conjunction with the input level on your DAW (Recording software eg Logic, Protools etc). With the gain on your DAW input set at 0dB your levels on that channel should not go above 0dB. You adjust this on the audio interface but are checking the result on your software. If your audio interface has a level/peak indicator, make sure it is not peaking there also but it is unlikely if you have checked it against the DAW input
  3. Software input on your DAW. Keep this at 0dB for setting the levels as this does not affect the actual input level (on most DAWs)
While this article is focussing on peaks that are too loud, it is important when recording audio that the signal should not be too quiet as well. Otherwise you will introduce unnecessary noise and hiss. Also make sure you record mono signals such as microphones into a mono channel - otherwise the unused part of the stereo channel will also introduce hiss (the repair of splitting the stereo into 2, normally requires a special utility - but I won't cover that here)

Mixing
Don't let individual channels go above 0dB as that will introduce distortion
If some channels are above 0dB and your mix is sounding balanced, Look for your loudest peaking channel and for example say it 4.3dB - then lower every channel by the same amount - say 5dB to give a bit of headroom
If you've already started using automation that will be a bit of a pain as you have to reset it all. So get this done before you start adjusting the volumes with automation.
If you organise your mix with busses this can also make this easier.
So for example I may define bus 1 to be drums; bus 2 to be synths; bus 3 other instruments; bus 4 main vocals; bus 5 backing vocals.
Then name and colour them in a way which make it clear what grouping of tracks you have routed to the bus. I also order the tracks on screen in the same order as the busses.
So if only the synths are peaking - you would still need to bring down the individual channels that are above 0dB but you could bring down all the instruments to match by reducing volumes on the busses in just one action.

Adding effects will also these levels, especially compressors, but even delay and reverb can add to the overall level and make it peak.
So you may have to repeat a little bit of this process. You may have a bus that is peaking, and therefore need to bring down the volumes of the channels that are patched to the bus.

So why not just put a limiter on the channel and the jobs done? Limiters should be used where needed but if you put a limiter on a channel that has not already been tamed, you will get unnatural squashing of the dynamics. If you apply a limiter to the bus - likewise you make get an unnatural dynamic and pumping of some sounds. (Of course you may want that - in which case fine!). I generally mix without the limiter in place and add it last of all to ensure that there are no rogue level peaks.


Wednesday, 11 April 2012

Hip-Hop recordings and demos

What qualifies me to write about making hip-hop? As artist management, I get countless mp3s, mixtape and youtube links sent to me everyday. I have released hip-hop on my label and recorded rappers in the studio. Apart from that, I am just scratching the surface of the genre .......

Unsuccessful promotion

  • YouTube videos accapella singing or rapping with a major artists track that you are playing through your earphones
  • Beats that take endlessly loop around the same 5 second segment from start to finish.

Pre-made beats
There are many producers out there who make excellent beats that are available for a few pounds/euros/dollars on a non-exclusive usage. That means other people can buy and use the same beat. Buy the beat - don't use the website sample especially when it includes the beatmaker's name check spoiler.

Here are just a few links


Quality
Check what quality the beats are delivered from the various producers. Ideally they should be MP3's with a bit rate of 320kbps. An MP3 compressed to 128kbps is really too lo-fi.

There are other options too. Some will also let you buy the individual parts for re-mixing (still non-exclusive) and also if no-one else has bought it you have the possibility to buy an exclusive beat for a few hundred dollars or more.

Wednesday, 2 November 2011

Working with video voiceovers

Creating a voice over on video brings with it a few additional factors. On the one hand the audio is not as demanding as recording music, and then there are space constraints as the computer monitor(s) will need to be visible.

Equipment
  1. Studio condenser microphone large diaphragm. To keep it simple you can use a model with a USB connector designed for Podcasting . This removes the need for Audio Interface device, less cabling and so easier to connect. There are some USB microphones at about £70 (entry level – but for talk-over quality will be fine), Samson CO1U USB or iSK CRU-5 USB (nice retro look!).  £150 would get a brand name more known for pro equipment such as Audio Technica AT2020 USB (but this is still their entry level)
  2. A microphone stand, desk fastening with suspension arm as used in radio stations: RODE PSA1 Broadcast Studio microphone stand (about £75 though there are some cheaper chinese ones available)
  3. A pop filter (large) £10 – though may get in the way so I would say optional. They are not used in radio stations. Likewise the cradle to prevent unwanted vibrations is unnecessary in most applications.
  4. Acoustic treatment: the idea I had yesterday would be in the way too much and instead I would suggest 2 x Acoustic Treatment Foam Panels to go in front and behind the narrator. Total price about £180.  You can make a pair of hinged plywood boards to place behind the narrator and possibly stand up the other foam panel behind the computer monitors. This will not block out all unwanted sounds but will dampen it and prevent unwanted reverb within the room space
Post production


All the audio should be post processed to improve quality.
  1. Compression. Makes the quiet parts louder and the loudest parts slightly quieter – evens out the sound. In professional recordings compression is always used and is applied to the appropriate degree to maintain dynamics
  2. De-essing (maybe) removing sibilants
  3. EQ: enrich the voice tone, remove hiss and hums (hopefully not too much there)
  4. Remove noises ("transients")
  5. Add reverb – The sound treatment will have removed most natural reverb, adding some controlled reverb back makes it more natural (ironically)
  6. Maximising overall volume

1,2, 3 & 5, 6 would very soon become fixed presets (actually for each narrator) based on a known environment

Monday, 12 September 2011

Live sound - using your laptop for your sound

There are 3 stages to this article. Each of these have multiple ways of achieving similar results
  1. Creating your sound. Setting up the software to be the instrument that you want
  2. Using a keyboard to get the MIDI signal into your computer
  3. Connect Audio

Creating your sound
There are 3 ways. In this we will take the example of a simple piano.
  1. Use a plugin virtual instrument with your DAW software (Logic, Cubase, Protools, Ableton etc). If you have a windows computer this will be a VST, if you using an iMac then this could be an AU or VST depending on your DAW. Eg: Piano which conveniently has both a Mac and Windows version
  2. Alternatively you can use a stand-alone virtual instrument software. This would run as a stand alone software. Eg: midipiano_chung. Run the software, plug in midi and all is done
  3. Lastly there is the hybrid solution, using what is known as a VST wrap-around. Here you install the VST in your computer and install the wraparound software. This takes the place of the DAW and has very much more simplified controls
    1. Window VSTHost
    2. iMac VST Lord actually designed as a test program. 
    3. Mac users can also use Mainstage but this only hosts the instruments that come with Logic and Garageband - however if they are what you need on stage then Mainstage is definitely the way to go


MIDI input
Next you need to connect a keyboard to your computer. Again there are choices.
  1. Use a MIDI interface that connects to your computer with a USB or Firewire connection
  2. Plug in a keyboard that has a USB connection
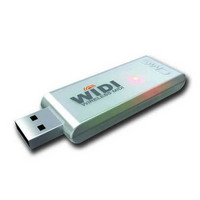
  3. Use a keyboard that provides a wireless MIDI signal together with a USB wireless receiver. Eg: CME UF series of keyboards

Connect Audio

  1. Very simply you can connect your computer headphone socket via a cable to the amplifier/mixer (mini stereo jack to twin mono jack cable)
  2. Or allegedly better quality sound (depending on your laptop) you can connect an external sound card via USB and connect that as out to your amplifier/mixer


Working example
  1. Install midipiano_chung on to laptop and run the program
  2. Plug in Midi Wireless USB and install WIDI driver
  3. Configure settings on midipiano_chung to use the correct MIDI input
  4. Switch on CME keyboard
  5. Plug your computer audio into amplifier

Monday, 29 August 2011

Video recording and audio

I am new to video and so will not try to advise anything on how to film but I have very quickly come to realise that I can certainly help on sound.

I have also very quickly learned why I need a clapper board/slate. Sound has to be recorded separately to the camera - even when recording voice.
To record close-up speech, I tried using an Audio Technica Lavalier Condenser microphone plugged directly into the camera's audio input. First of all interference noise made it unusable. I found out that the Audio Technica ATR-3350 is very susceptible to interference from other equipment. The only other gear was the HDMI monitor screen. I plugged out the monitor and recorded again and the interference was gone. However on the subsequent recordings there were high levels of hiss. Further research showed that this is specifically a Canon EOS issue. The audio stage of the camera features an Automatic Gain Control (AGC) so during any silences the camera turns up the gain causing the hiss. I have read some interesting/smart/messy/expensive workarounds on this to fool the AGC but none of them actually do what Canon should have done, which is provide a configuration switch to disable AGC. In the end, it is easier and of course better quality, just to record the audio separately and synchronise it back together in the computer - hence the clapper board to give you a synchronisation mark. You can use the audio in the camera just to verify the synchronisation. There are a number of excellent tutorials on how to do this on YouTube.

So finally I am not really treating music, speech or general sounds distinctly different. As with any recording the mic'ing recording should be done with the best method for the job.

  1. Speech: Record directly into Logic Pro
  2. Live Music: I use a Boss BR-1600 with 2 inputs from the mixing desk and an ambient boundary mic. (I'd like more inputs but that may sacrifice monitor outputs needed by the musicians on stage)
  3. This leaves the issue of general mobile recording (not music - and presumably without a power socket being available). Most people sing the praises of the Zoom H4n and I will be investing in one before long. In the meantime, I can use my MacBook Pro which is more cumbersome but with an audio interface will give me the best sound quality and a battery life of a few hours.
After the filming/recording, I mix whatever stems there are first in Logic 9 to as near a finished product as I can, EQ, gain, effects if needed and then bounce down to 48K sample rate (because this is film - normal audio is 44.1K). Theoretically I may have to re-mix, re-edit post production but if this version is mastered quality, in most cases this will be the finished audio.

The audio should be then sync'd with your video using the clapper marking point or some other distinct moment that can be identified in the wave form shown on screen, and once sync'd, locked together.
Now the video (with its audio) can be cut, sliced, etc and possibly additional audio samples added in the video editing suite.

After the video edits are done, perhaps it all sounds good at this stage. If so, the job's done already. If not you can now bounce the video back down again as a WAV file; bring it back into your DAW and re-mix/re-edit using the original sound files. If you know the material, you should not find it too difficult to re-align the original source material to the video edited version. Obviously do not change any of the timing in the video's audio file. Using the Video's WAV as a timeline, any changes made to the finalised audio are then easy to re-align back into the video.

Audio Mastering


The work of audio mastering is the final stage in preparing your music for distribution. On tracks collected on to a CD, it includes matching volume levels and EQ to give the album a uniform sound. EQ is also used to enhance and bring out certain features of each track possibly vocals and percussion. It also includes trimming tracks, setting spacing between tracks. Especially with live instruments and generally on live recordings, the mastering engineer can remove unwanted noises, pops, bangs, sibilants and coughs (even behind the music). This is why it costs more to perform the mastering on live instruments and live recordings rather than the music produced "in the box"

Here are a few notes on submitting tracks for Audio Mastering. The people tagged on this note are mostly unconnected with the recommendations and these notes are intended for future projects (and partly as an advert).

Definitions

Producers: I refer to 2 different types of producer though in some cases this is the same person. The Beat Producer who creates the backing track; The Studio Producer who records the artist and produces the final mix. Some of these comments apply to both.
Stems: This is the bounce of each individual instrument/voice etc as a seperate file. It can be stems with or without effects and it should be specified which is required

Do's and Don'ts

  • I need high quality WAV or AIF files. I can resurrect and enhance an MP3 if that is all there is but this will never be as good

  • Do not trim the recording right up to the first note of the track. Leave some space and I will trim it

  • Do not chop the end of the track too soon. Especially do not chop the reverb tail or a ringing note. This is usually the fault of automated bouncing of tracks. You can extend the length of the bounce by adjusting the setting to include effects trails or simply by extending time a few seconds. This is something I can fix, but would rather not have to.

  • You can leave the fades at the end of the track to me; a note telling me when to fade would be nice

  • While you will want to put compression on individual stems, PLEASE do not put compression on the whole track. This is best done at the mastering stage.

  • WAV and AIF files are pretty big. You can use YouSendIt or a similar service to send a single file but for a full set of files it is better to use FTP. I can set up an FTP account for you to transfer the files to my server.


  • Information required

    Some of the following information is required as it is embedded in to the master CD image and iTunes tags.
  • Purpose of mastered tracks: CD, iTunes, MP3 downloads. It maybe that I need to produce multiple versions of each track to suit its destination.

  • Name of each track in the required order on the CD

  • Gap required between tracks (can be different per track). Without a specification, I will use 2 seconds

  • Any useful notes/opinion on tracks needed to assist me in the Audio Mastering

  • Names of any featured artists

  • Names of any writer(s) (This should include the beat producer, i.e. the maker of any backing track/beat)

  • Name of the studio producer for each track

  • Declararion that all material is copyright to the writers listed and that no unauthorised samples have been used

  • I can provide a form for this information on request.

    Remixing and Radio Edits

    I can do Radio Edits from the final mix files, but it is much easier to do this with the stems (with effects)
    Remixing: I really do need the stems for each instrument and vocal; with or without effects depending on how much you want doing. I would prefer an MP3 of the original mix as a guideline unless you want me to just start again.

    About my work

    I qualified in Audio Mastering at the Berklee College of Music, USA. I have done mastering on all types of material from hip-hop to classical. Mastering starts at £25 per track for tracks made "inside the box". Mastering of live recordings is by quotation after I have heard the source material.

    Using an FTP software to transfer files


    Who: This note is for producers and musicians recording in their own studio

    Difficulty Level: 1/5
    Purpose: To transfer large files.

    In a previous note, I described how to do FTP using Explorer (PC) or Finder (iMac). Using a specialist FTP software is far easier and faster, and many programs are actually free.

    FTP Software

    There are a number of free downloads of FTP client programs as well as a few that cost a few pounds
    • PC: FileZilla (free) etc
    • iMac: Filezilla (free) / Yummy FTP etc

    At the basic level you need 3 pieces of information
    1. Name of the FTP Server: in my case www.affinityentertainment.co.uk
    2. User Name
    3. Password: this is case sensitive to user capitals or lowercase as given to you

    Once set up you can drag and drop files between your computer and the other computer, or vice versa